Tuesday, March 2, 2010
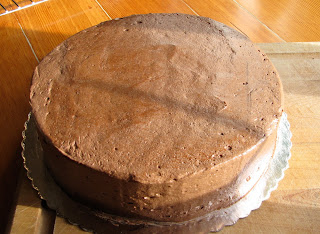
Best Ever Chocolate Cake - Part 2 Icing the Cake
In the last entry we baked the best ever chocolate cake, now it's time to make it look beautiful. Before you begin make sure your cakes are completely cooled. Have you ever tried to ice a warm cake......did you create the great slide? Icing will melt on warm cakes and you will never want to try again! If you are tight on time just go ahead and remove the cakes from the pans and put them in the freezer for a faster cool down.
The first step to icing your cakes is to level the tops off. If you notice in this picture there is a big gap along the sides of the cake. This cake would require a large amount of icing to achieve smooth sides.
So instead, we bakers, cut off the top and save for other uses. Okay perhaps at work the leftovers are used up but at home this time we ate them!
The key to getting a level cut is to keep your serrated knife blade level and horizontal to the cake. This take practice and often times you will have one side higher than the other. Just get down at eye level to the cake and trim where necessary taking care not to trim off half the cake!!
Now there are no gaps between the two cake layers. Let the icing begin. You can use any type of icing you wish, in this case I used Hershey's "Perfectly Chocolate" Chocolate Icing.
If you are using a cake board it's always a good idea to add a dot of icing to the board to help the cake stay in place.
Place one cake round cut side up on the board. Add about 1/2 cup of icing for an 8" or 9" cake. Spread the icing over the surface with a cake spatula.
Go beyond the edge with the icing and even out the surface.
Top with the second layer cut side down. Add enough icing to cover the top and down the sides.
NOTE: Typically a cake will get a crumb coat before this stage. A crumb coat is a thin coating of icing spread all over the cake and then refrigerated. It's purpose is to seal the crumbs so when spreading this final coating no crumbs stick to the icing. Crumbs are deadly!!
Once again spread the icing beyond the edges of the cake.
Hold the spatula parallel to the cake and on a slight angle.
Hold your spatula vertically and at a 30 degree angle to the cake and ice the sides. Never let the spatula get ahead of the icing otherwise you will end up with crumbs on your icing. Instead push the icing forward with a gentle back to forth action.
You will end up with a buildup of icing along the top edges. To smooth, once again hold your spatula parallel to the cake on a slight angle and draw the icing towards the center of the cake.
To smooth out and remove air pockets dip the spatula in hot water and wipe after each use.
Clean up the base of the cake with a damp cloth.
For a decorative touch create a border by piping around the base of the cake. Hold the piping bag at a 45 degree angle.
Decorate as you wish and enjoy, you worked hard!!!
Subscribe to:
Post Comments (Atom)


No comments:
Post a Comment